|
Stuart's Mic Preamp
|
|
I have visited and recorded in lots of music recording studios in my time - some of them world class - and have used and learned about a fair share of top-level gear. I've also been recording in a home studio type environment for many years, but in all these years I have never owned a great microphone preamplifier (the electronics that goes between the microphone(s) and the recording device - its job is to boost the signal from almost nothing, up about 20 to 70 decibals, which is then 'loud' enough for a computer to record). Most of the mic pre's I've used in the past were cheap ones that were either built into mixing boards or into soundcards (definitely nothing special!). About a year ago I began studying mic preamp circuit topology, and really started looking closely not only at the best mic pre's on the market, but also at the differences between these units (Neve, Universal Audio, API, and others). One of the biggest differences is the use of audio transformers; trasformers can add a cool sound - if you want that style of sound - but its always either one sound or the other with preamps - never both! I decided to go with the most neutral-sounding design I could find (transformerless design) - the double-balanced circuit first created by Graham Cohen in the 80's (double-balanced means that the circuit amplifies both the positive and the negative sides of the signal from the microphone, then mixes the two opposing signals back together - this helps to eliminate common-mode noise). His design had an ultra-clean sound, and because of this was quickly picked up and licensed by SSL for use in their massive and insanely priced studio consoles. A little later it was chosen by Millennia as the cleanest sounding topology - Millennia now uses this double-balanced circuit in virtually all their designs (Millennia mic pre's cost $2k and up!). This page shows the various stages in my construction of this amazing mic pre, for a fraction of the cost of a Millennia - and with the added feature of a high-end, two-channel DI... |
|
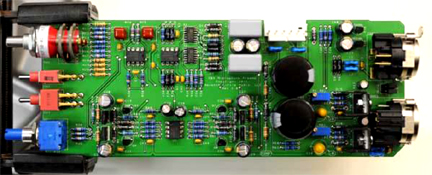
I started out with two empty preamp PCB's (Printed Circuit Boards); these boards were designed and manufactured by Tim Ryan at Seventh Circle Audio in Oakland, CA (I also got the schematic and all the parts from them). This picture is a scan I made of the front and the back of one of the boards (the two boards are identical; one for each channel, so you need two for recording stereophonic sound sources). |
|
 |
After many hours of extremely tedious soldering (each board has about a hundred tiny parts!!!), I was finally done with the main task - I had two sweet preamp boards fully loaded and ready to go! Before moving on, I used a volt/ohm meter to test each board before powering them up. Then I held my breath and applied voltage from the power supply, and took a few more measurements (one of the boards showed a problem, but after about a half hour of troubleshooting I found a short on the back of the board caused by too much solder - problem solved!). |
|
Then it was time to put together the power supply circuit board; this was much easier, as the there are only about 20 parts for the power supply. Time - around 45 minutes. |
 |
|
|
Then - tragedy struck!!! (I'm exaggerating - something did happen that wasn't fun, though...). Tim from SCA informed me that his boards needed more voltage than what was shown on his website; the website showed that I only needed between 15 and 35 Volts DC (+ and - supply, or 'Bipolar') - so the supply kit I ordered and built (from Five Fish Studios) was +/- 24 VDC. When Tim said I would need +/- 30 VDC I almost FLIPPED (flipped him off, that is...). So I 'hit the books' and discovered that I would need to purchase a larger torroidal power transformer (shown on the left), and with only a slight modification of the power supply circuit I'd be good to go. I did the necessary calculations and replaced two tiny resistors on the power supply board (the hardest aspect of this is that they were very difficult to reach and replace since all the larger components were already tightly in place around them). And after waiting for roughly a week I had the new torroidal transformer in hand, and the power supply was ready to install into the enclosure.
|
|
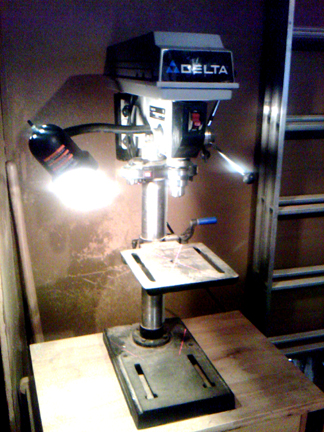
I ordered the metal enclosure from ParMetal - it took way too long to arrive, due to the fact that they were having problems in their painting room. But after about 3 weeks I finally received the package. Because this was a custom project, the enclosure that I bought was completely blank - no holes in the front or back. So I bought a used drill press (which I just sold for a $1 profit!) and spent a couple days drilling out the aluminum front panel and the steel back panel; I also drilled some holes on the bottom panel for the large transformer and power supply mounting. It turns out that drilling large holes in metal is an xtreme pain in the yin-yang! After testing the variously sized holes to make sure everything would fit properly, I sprayed the front panel a few times with a cool, metallic blue epoxy. |
 |
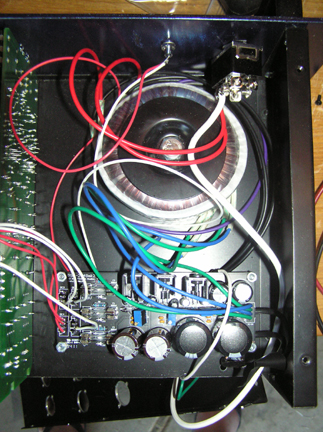 |
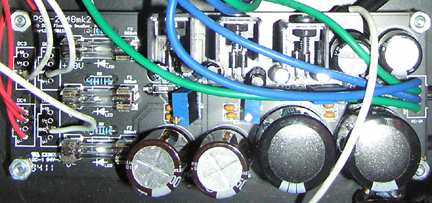
The first items I mounted were the torroidal transformer and the power supply board. Then I mounted the power switch and power indicator light (LED) into the front panel, a fuse holder into the back panel, and wired everything together. I built a custom wiring harness to go out from the power supply and parallel into each of the audio boards. Around this time I ordered another board and parts kit from SCA - once I had that board put together I had an active DI module. A DI (Direct Input) allows you to connect keyboards, guitars, or anything that has an audio output; the DI then converts the impedance (there's a tiny impedance switch for each of the two channels) and sends the signal into one or both mic pre boards. This DI module will mostly be used to record bass guitar in my particular studio scenario (and 'straight' electric guitar signals as well, for the sake of future re-amping). |
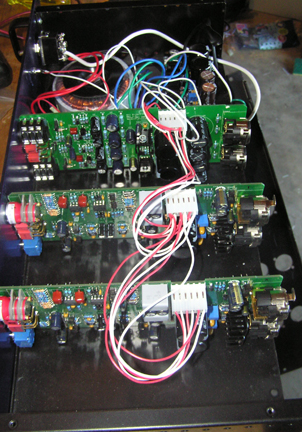
| Once the power section was mounted and wired, I installed the three audio boards into the enclosure and connected the parallel wiring harness to each one. |
 |
 |
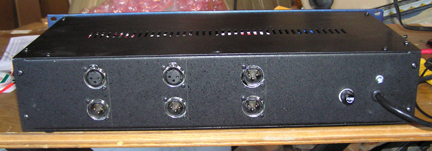
With everything mounted I started closing up the box! |
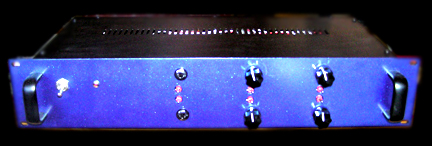
| After it was all 'buttoned up', I stood back and appraised the fruit of my labors - talk about warm-fuzzy!!! |
|
|
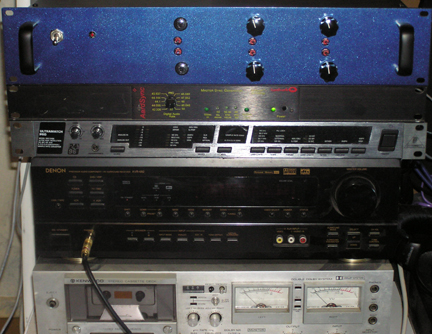
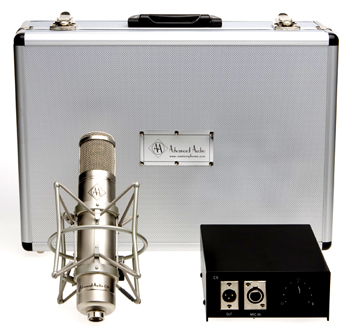
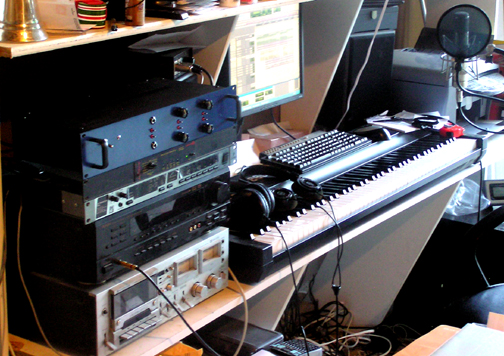
Now it was finally time to setup the unit in my studio and test the audio - the most exciting part! I was extremely disappointed at first - terrible hum in both channels :-o So after re-checking the circuitry, I sent an email to Tim at SCA. He sent me back a reply which was not helpful at all (I tried what he suggested and the hum remained). After having already been frustrated with Tim about the earlier power supply issue, my frustration had now doubled (Tim's email talked about the terrible complexities of system design, and that it wouldn't be possible for him to give me any more specific advice). So I did some research (a couple days worth!), and after finding nothing of much use I finally stumbled across a great website which intelligently covered the nebulous subject of grounding (a 'ground' is an electrical connection which is either electrically neutral or electrically shielding - and best if it's both!); the author covered everything I needed to know with a single page of information (or maybe three pages if it was printed on paper). I put this knowledge to use, and the hum immediately disappeared!!! I drew a painful conclusion from both the power supply 'problem', and from the grounding issue; My conclusion is that SCA was trying to manipulate me into purchasing both their very expensive power supply and their very expensive enclosure. Tim could easily have included a single page on his website that covers the basics of grounding and associated problems; the fact that he didn't offer any useful help with this issue (which is a very common issue with DIY projects), combined with the fact that after modifying my power supply and purchasing a whole new transformer, everything worked fine with the voltage that I had originally planned on using (+/-24VDC)!!! This issue aside, I'll still have to say that Tim's design of the preamp and DI boards were spot-on... After making a few audio recordings (using my Advanced Audio CM 12 tube mic!), I was stoked. This preamp is a dream-come-true; crystal clear, sonically un-colored, nearly noise-free (all electronics have a tiny bit of noise - its unavoidable), and not fantastically expensive like every other double-balanced unit I've seen. The pictures below show the preamp in my current home studio, along with my favorite mic. And keep an ear out for some recordings in the near future (I'm producing four albums at once right now - call me zany)... |
 |
 |
 |